Start Picam360 with Jetson Nano – 3: Install the Server Software
2021-04-27 2022-01-28
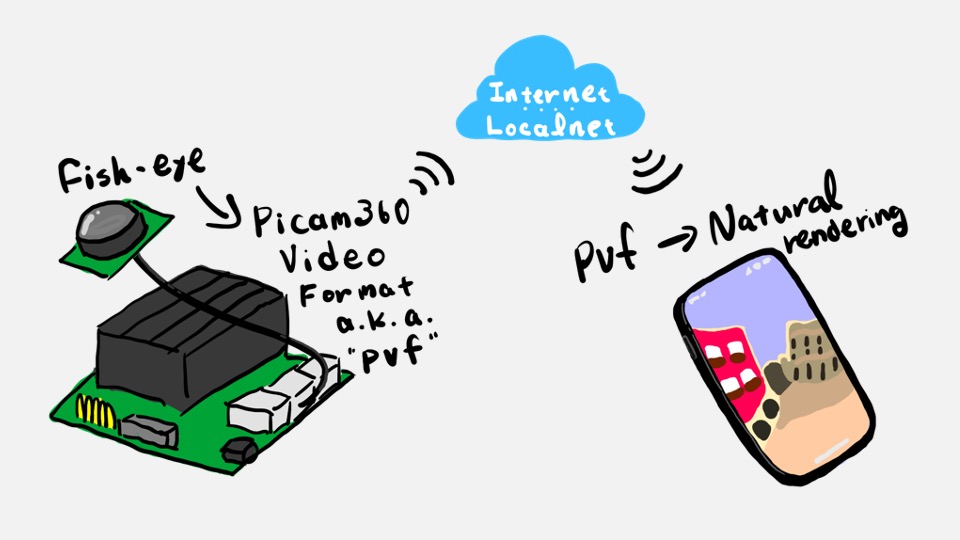
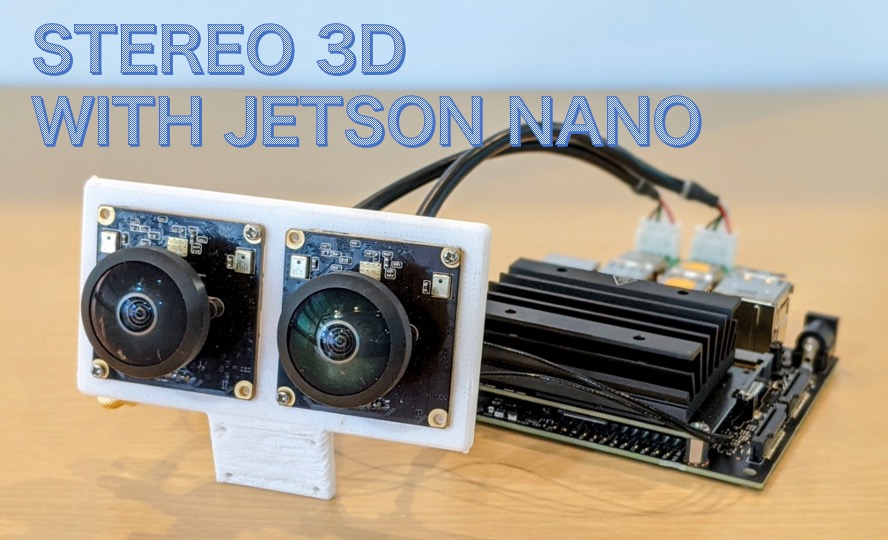
This is the 3rd in a series of articles on how to connect a Picam360 camera to a JetsonNano and stream 360 degree video in real time.
Hi, my name is GAKU from the Picam360 development community.
In the previous post, we wrote a disk image to the SD card and configured it for the first boot. In this article, we will show you how to install the server software. The server software is called PServer. PServer is responsible for capturing the Picam360 camera video, converting it to Picam360 Video Format (PVF), and streaming the converted video to viewer applications.
Install the Server Software
Use the command line interface to install the softwares. Each time you execute a command, be sure to check the command execution result displayed on the screen to make sure it has been completed successfully. Even if you run the command according to the steps, you may still get errors due to the new SD card image or software. Most of them can be solved by searching the web for the error message.
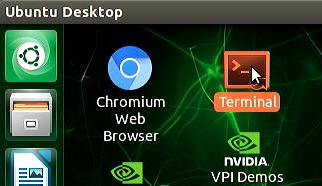
Run the commands to install the required softwares. Launch a terminal to run the commands, either directly on the Jetson Nano or remotely using ssh. You can use whichever you prefer.
Directly operate the Jetson Nano:
Connect a monitor, keyboard, and mouse, and launch the terminal from the desktop.
Remotely operate using ssh:
On a Mac, open a terminal; on Windows, open a command prompt. Windows 10 version 1803 or later comes with an SSH client, so you can execute the ssh command from the command prompt. Otherwise, you will need to install an SSH client.
Execute the ssh command.
$ sudo ssh <USER NAME>@<COMPUTER NAME>.local
# e.g.: sudo ssh picam360@picam360.local
When you run the command, you will first be asked for the login password of the remote computer, which you will enter. Next, you will be asked for the login password for the Jetson Nano.
Password: <LOGIN PASSWORD OF REMOTE COMPUTER>
picam360@picam360.local's password: <LOGIN PASSWORD OF JETSON NANO>
The terminal is now ready. Now let’s install the necessary softwares for PServer.
First, install curl to download data from websites, and nano, a text editor.
$ sudo apt-get -y install curl nano
Enable the auto-login setting so that you can use Picam360 with Headless (no monitor). Open and edit the Display Manager configuration file in nano.
$ sudo nano /etc/gdm3/custom.conf
Remove the # and change the user1 part to your own user name:
#AutomaticLoginEnable = true
#AutomaticLogin = user1
Example:
AutomaticLoginEnable = true
AutomaticLogin = picam360
Press Ctrl+o, Ctrl+x to save and close nano.
Restart the Jetson Nano.
$ sudo reboot
Open a terminal, or reconnect if you are using ssh.
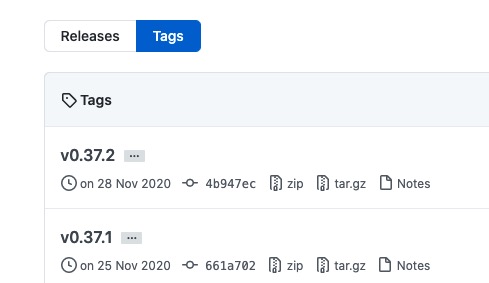
Install nvm in order to install node.js. Visit https://github.com/nvm-sh/nvm/tags/ and note down the number of the latest version.
[Tips] The verified environment lists the version of the packages in which the Picam360 software is known to work. It is recommended that you use that version.
Install nvm. Replace the version number with the one you made a note of.
$ curl -o- https://raw.githubusercontent.com/nvm-sh/nvm/v0.38.0/install.sh | bash
Close and reopen the terminal to reflect the results of the installation, or reconnect if you are using ssh.
After reopening, next install node.js and npm.
[Tips] The verified environment lists the version of the packages in which the Picam360 software is known to work. It is recommended that you use that version.
# Install the latest version of LTS
$ nvm install --lts
# Configure to use the latest LTS
$ nvm use --lts
To specify a version
$ nvm install VERSION # ex) nvm install v14.17.0
$ nvm use VERSION
Verify that node.js and npm have been successfully installed.
# Version display. If it appears, it's OK (v14.17.0 @ as of March 2021).
$ node -v
# Version display. If it appears, it's OK (v6.14.13 @ as of March 2021).
$ npm -v
Now you have the necessary peripheral softwares for PServer. Now let’s install PServer and complete the configuration.
[Tips] The verified environment lists the version of the packages in which the Picam360 software is known to work. It is recommended that you use that version.
$ npm install -g node-pserver@0.1.3 # To specify a version

# or

$ npm install -g node-pserver
Check the installation of PServer.
# If the path appears, it's OK.
$ which pserver
Configuration
Place the configuration file of PServer.
Create a folder to place the files.
$ cd ~
$ mkdir pserver
Go to <Verified Environment> and copy the File ID of the configuration file for the single camera (node-pserver config file).
Replace the FILE_ID part of the following command with the ID you have copied and execute it. The configuration file will be downloaded.
$ cd ~/pserver
$ curl -Lo jetbot-vr180x1-config.json https://drive.google.com/u/3/uc?id=FILE_ID&export=download
# e.g.: curl -Lo jetbot-vr180x1-config.json https://drive.google.com/u/3/uc?id=1LPxTrGARjiowZ3jPxtD433YKSK7BHU5o&export=download
Open the configuration file that you downloaded.
$ nano jetbot-vr180x1-config.json
Enter the parameters of the camera to be used:
>>>node-pserver: 0.1.7 or higher
Change the input camera information in this section.
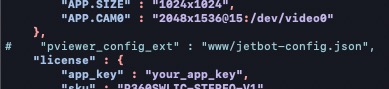
"params" : {
    "APP.SIZE" : "1024x1024",
    "APP.CAM0" : "3840x2880@15:/dev/video0"
},
Value by camera
[PICAM360-4KHDR] 3840x2888@15
[PICAM360-CAMPT8MP] 3264x2448@15
[PICAM360-CAMTWDR] 2048x1536@15
<<<node-pserver: 0.1.7 or higher
>>>node-pserver: 0.1.2
- @APP.CAM0@ and @APP.SIZE@
Rewrite @APP.CAM0@ and@APP.SIZE@ in the default element in stream_defs to match the connected camera.

@APP.CAM0@ specifies the camera’s input resolution and input FPS in the following format.
(The number at the end of /dev/video0 is usually 0, but it may change if you have other cameras connected. For more information, do a web search using keywords such as “linux dev video”)
[PICAM360-4KHDR] 3840x2888@15:/dev/video0
[PICAM360-CAMPT8MP] 3264x2448@15:/dev/video0
[PICAM360-CAMTWDR] 2048x1536@15:/dev/video0
@APP.SIZE@ is the value used when converting the input image to Picam360 Video Format, the meaning of which will be explained another time. Set it to the following value.
1024x1024
The following image shows an example after the replacement.

<<<node-pserver: 0.1.2
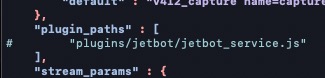
Comment out unnecessary settings:
Comment out the elements in plugin_paths and pviewer_config_ext elements if exist with # at the beginning of the line. These are settings for Jetbot, and are not used in this project.
This completes the installation of the server software. Continue next.
Series: Start Picam360 with Jetson Nano
- Items for Getting Started, and Notes
- Write Image to the microSD Card
- Install the Server Software
- Camera Calibration
- Install the Viewer App
- Connect
Picam360 Links:
- Web Site: https://www.picam360.com
- Web Store: https://store.picam360.com
- Twitter: https://twitter.com/picam360
- Facebook: https://www.facebook.com/Picam360/