Start Picam360 with Jetson Nano – 1: Items for Getting Started, and Notes
2021-04-13 2021-05-29
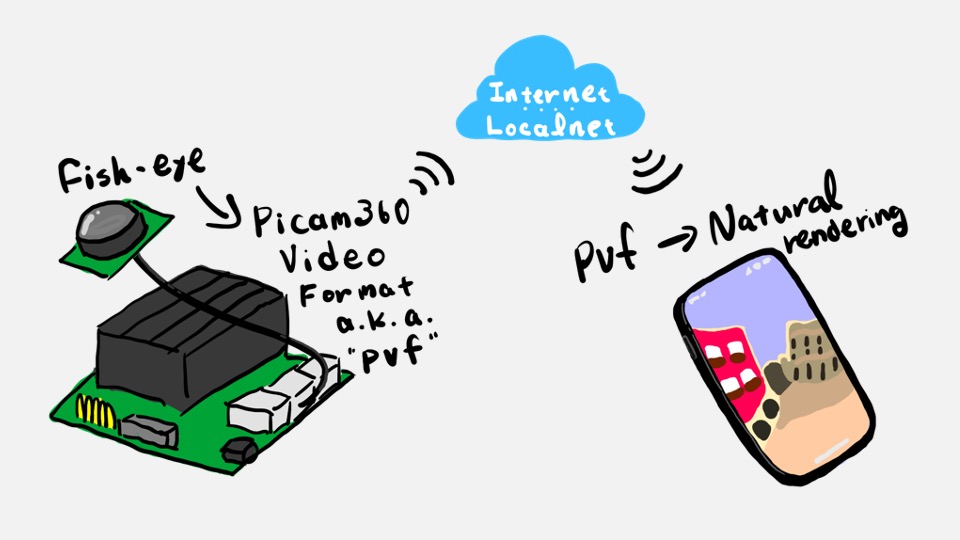
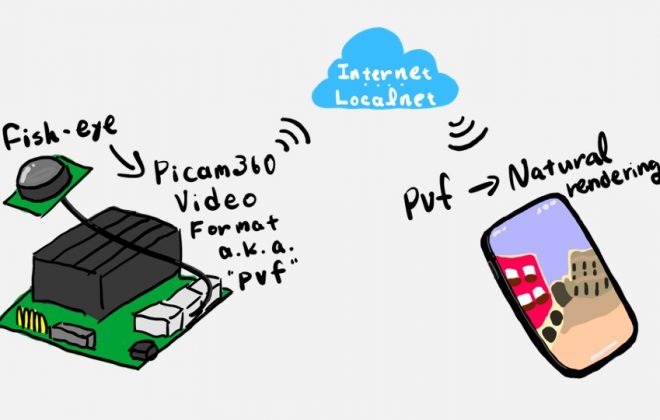
Here are the steps to connect a Picam360 camera to a JetsonNano and stream 360-degree video in real time.
Hi, my name is GAKU from the Picam360 development community.
In my previous post, I gave an overview of Picam360. In this post, I’ll show you how to set up a server device and viewer application to stream 360 degree video in real time over a local network or over the Internet.
There are multiple combinations of server devices and viewers. Future posts will be a combination of some of the following.
- Server Devices
Jetson Nano, Mac, WindowsPC
- Viewer Apps
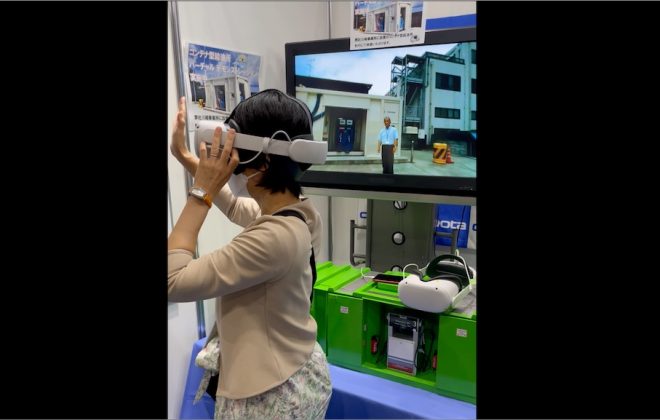
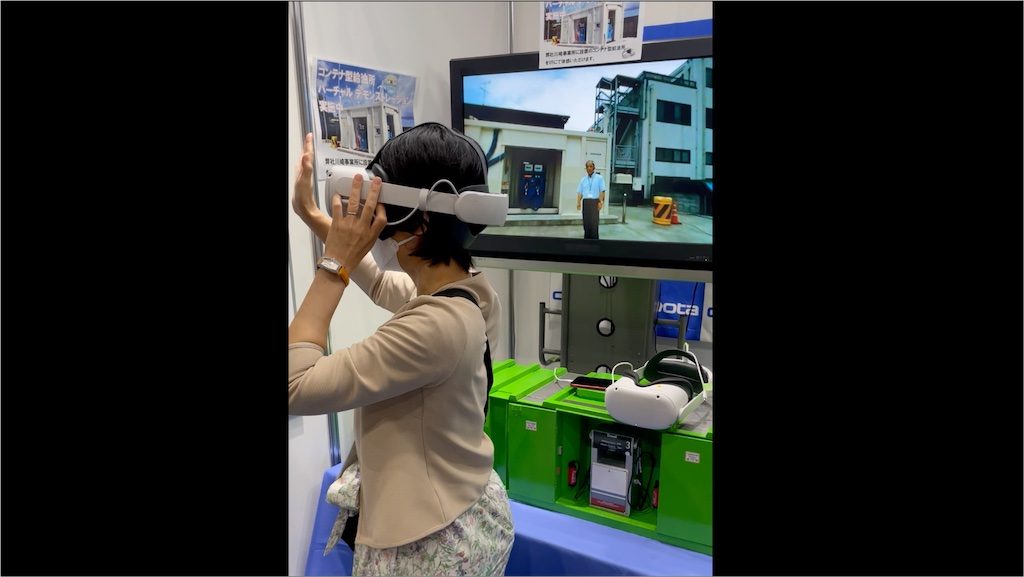
Smartphone app(iOS, Android), Browser app, Oculus app
This time, connect a Jetson Nano to a smartphone
This time I will install the server software on a Jetson Nano and use a smartphone as the viewer.
This article will be presented in a series. (The number of articles may change).
- Items for Getting Started, and Notes
- Write Image to the microSD Card
- Install the Server Software
- Camera Calibration
- Install the Viewer App
- Connect
Before we get into the explanation, there are some notes.
Notes
Functional limitations
There is a paid license for using advanced features, but it is basically not necessary when using the Picam360 camera. The license is intended to be used in cases where you are building your own high-specification system.
When used without a license, the following limitations apply. There are no imitations other than those listed below, but they are subject to change without notice. If you have any questions about the license, please contact us from here.
- Frame rate limit: up to 15FPS
A paid license removes the FPS limitation of the software. The maximum FPS based on the hardware potential depends on the number of input pixels of the camera, the number of output pixels set in the software, and the processing performance of the computer that processes them. Therefore, the maximum FPS depends on the system you build. As a guide, when using GeForce RTX2060, the output image size is 2048×2048[pix] and a processing speed is 300[frame/sec]. The PICAM360-4KHDR has a camera output of 15FPS, so no license is required.
- Camera connection limit: up to 1 camera
A paid license removes the limit on the number of camera connections. A license is required to connect two cameras like Stereo 3D, but for those who purchase two or more Picam360 cameras, we will provide a free basic function license that allows the connection of two cameras. If you want to connect two or more non-Picam360 brand cameras, you will need a paid license.
Connectivity over the network is not guaranteed
Connection via local network or the Internet may not be possible depending on the network environment. In particular, connections via the Internet using WebRTC are often not possible due to router security settings or PC firewalls.
- Unguaranteed
Connection via local network or Internet
- Guaranteed
Direct connection of LAN cable (anti-virus software must be disabled)
You are responsible for your own security
When connecting via a local network, the only information required by the client to access the host is the host IP address + port number. When connecting via the Internet (WebRTC), the only information required is the key you set. It uses a simple connection process, so please take security measures at your own risk. The source code is available on GitHub as open source.
Items for Getting Started
The stiff notes are long but important, so I have included them at the beginning. Please read this before you purchase Picam360.
Now, let’s get back to the main topic. In this post, we will use the following items.
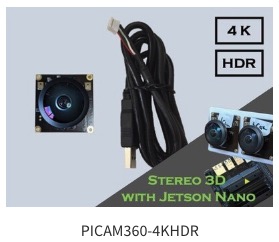
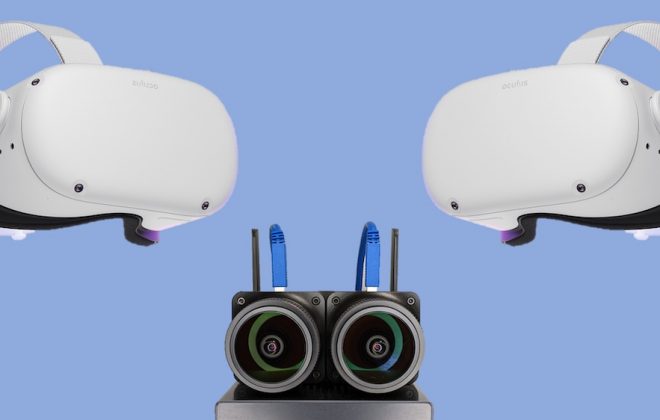
- PICAM360-4KHDR
PICAM360-4KHDR x 1 pc. For stereo 3D, it is two. Stereo 3D settings will be explained in the future post.
- Jetson Nano Developer Kit
You can use either the 2GB version or the regular version.

- Wi-Fi antenna
If you use Ethernet, you do not need a Wi-Fi antenna.
For 2-camera use, use M2 card type or USB dongle that supports USB3.0 and 5GHz connection.
Not all Wi-Fi antennas will work with the Jetson Nano. Search the Internet for “Jetson Nano WiFi antenna” to find a WiFi antenna that has been tested and is still available.
USB dongle type with two cameras:
Use a USB dongle that supports USB 3.0 and 5GHz connection.
-The reason for using USB 3.0 is to avoid the lack of USB bandwidth; if you use two USB 2.0 Picam360 cameras and a USB 2.0 Wi-Fi dongle, you will run into the problem of trying to send more data than the USB host controller can handle. Bandwidth is generally irrelevant between USB standards, so making the Wi-Fi dongle USB 3.0 will solve the problem.
-The reason for using a 5GHz connection is to avoid communication errors; 2.4GHz Wi-Fi waves and USB 3.0 interfere with each other, resulting in slowdowns and disconnections.
USB dongle type with a single camera:
There are no restrictions on the specifications. Search the web and choose one that has a good reputation for being used with jetson nano!
M2 card type:
Jetson Nano 2G version does not have M.2 interface, so M2 card type is not available.
Nvidia officially recommends the antennas listed on this page; the M2 card type often does not work except for the recommended ones, so we recommend using the recommended ones.
- microSD card (≥32GB, ≥UHS-1)
The Jetson Nano uses a microSD card as its boot device and main storage. It is important to have a card that is fast enough and large enough for your project. The recommended minimum is a 32GB UHS-1 card.

- Power (5V, ≥2.5A)
Provide power to the Jetson Nano. For use as a stereo camera system, a minimum of 5V, 4A is recommended. Using a current value lower than that may cause errors due to insufficient power.

(Jetson Nano Standard Version) The Jetson Nano can also use the DC jack for power. When in use, the power supply can be switched from the USB port to the DC jack by connecting a jumper pin.
- PC
The ssh connection is used to control the Jetson Nano remotely, and is not required if you want to connect a monitor or keyboard directly to control the Jetson Nano. This article explains how to set it up using an ssh connection.

- Keyboard, mouse, display (HDMI or DisplayPort)
Used for configuration.

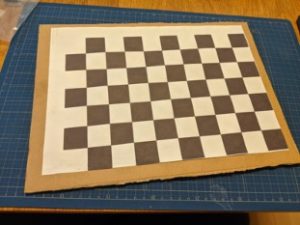
- Camera calibration board
Download the stencil file from the link below. Print the file at a printing magnification of 100% and paste it on a flat, hard board such as cardboard.
These are all the items you need. Continue next.
Series: Start Picam360 with Jetson Nano
- Items for Getting Started, and Notes
- Write Image to the microSD Card
- Install the Server Software
- Camera Calibration
- Install the Viewer App
- Connect
Picam360 Links:
- Web Site: https://www.picam360.com
- Web Store: https://store.picam360.com
- Twitter: https://twitter.com/picam360
- Facebook: https://www.facebook.com/Picam360/